

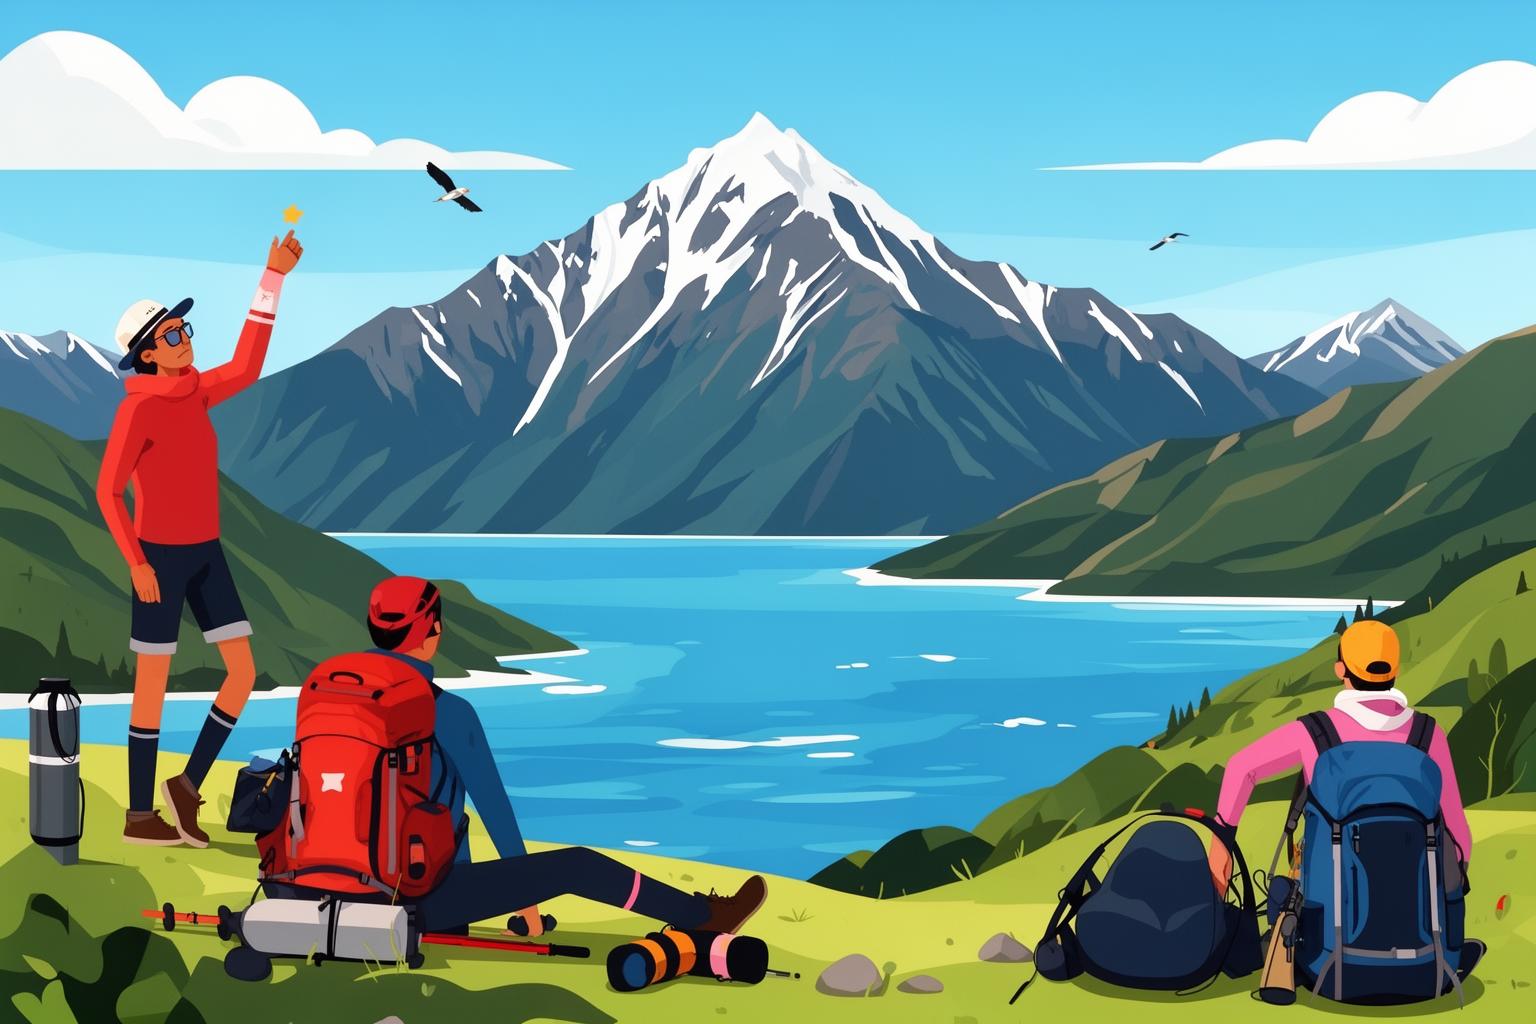
Welcome, adventurer, to the edge of the world. You’re standing on the precipice of a journey to New Zealand’s South Island, a place that isn’t just a destination, but a living, breathing epic. This is not the land of idle vacations; it is a realm carved by glaciers, painted with impossible blues, and cloaked in ancient rainforests. It’s the physical manifestation of Middle-earth, the backdrop to legendary cinematic quests, and the undisputed adventure capital of the planet. Here, the mountains are sharp and defiant, the fiords are deep and silent, and the spirit of exploration hums in the very air you breathe. To step onto the South Island is to accept a challenge—to hike higher, delve deeper, and push your own boundaries against a backdrop of staggering beauty. But this grand stage demands respect, and respect begins with preparation. Your gear is not just luggage; it’s your armor, your support system, your key to unlocking every wonder this land has to offer. This guide is your fellowship, a detailed scroll designed to ensure you are perfectly equipped for the saga that awaits. Forget everything you thought you knew about packing. We’re preparing for an odyssey.
This epic landscape, famously brought to life as the backdrop for Middle-earth, continues to inspire travelers drawn by the enduring tourism legacy of ‘The Lord of the Rings’.
Forging Your Adventurer’s Wardrobe: The Core Apparel

In the South Island, the weather is a capricious character in your journey. It can shift from brilliant sunshine to a biting alpine squall in the blink of an eye. Your clothing is your first and most vital defense. The key to comfort and safety here isn’t lugging one massive, bulky coat; it’s mastering the art of layering. This approach lets you respond with agile grace to whatever the mountains throw your way. Learning it is the essential rite of passage for every Kiwi adventurer.
The Sacred Trinity: The Layering System
Think of your clothing as a three-part harmony, with each layer playing a pivotal role. Together, they form a personal microclimate that keeps you dry, warm, and protected.
The Base Layer: Your Second Skin
This layer sits directly against your skin, designed primarily to manage moisture. As you push yourself climbing toward the breathtaking views of Roy’s Peak or paddling the calm waters of Abel Tasman, you’ll sweat. Cotton, a common travel favorite, becomes your foe as it soaks up moisture and holds it close, chilling you the moment you stop moving. Instead, embrace the magic of merino wool or modern synthetics. Merino wool, harvested from the sheep grazing the very landscapes you’ll explore, is a natural marvel. It wicks moisture away, breathes superbly, and expertly regulates temperature, keeping you warm even when damp. Even better, it’s naturally antimicrobial, allowing you to wear it for days without odor—a true blessing on multi-day treks. Pack at least two long-sleeved merino tops and a pair of merino leggings. Synthetics like polyester or polypropylene also excel at moisture-wicking, often drying faster and being more durable than wool, though they may be less effective at controlling odor. Your choice between them is personal, but commitment to one is crucial.
The Mid Layer: The Warmth Engine
The mid layer acts as your primary insulator, trapping body heat preserved by the base layer. This is where fleece and down come into play. A fleece jacket, commonly polyester, is the staple mid layer—warm, breathable, and quick-drying. A 100-weight fleece is ideal for cool active days, while 200 or 300-weight options provide solid warmth for evenings at camp or chilly ferry rides across the Cook Strait. For the ultimate warmth with minimal weight and bulk, down jackets stand unmatched. Filled with lightweight, highly insulating duck or goose feathers, they compress to the size of a grapefruit, making them perfect for backpacks. They’re great for lunch breaks on high mountain passes or stargazing in Aoraki/Mount Cook National Park’s crisp night air. Their Achilles’ heel is moisture; when wet, down loses its insulating ability. That’s why it pairs perfectly with the final, essential layer.
The Outer Layer: The Impenetrable Shield
This layer is your shell, your battle armor against the elements. The West Coast of the South Island sees immense rainfall, and the alpine winds can feel almost tangible. Your outerwear must be waterproof and breathable. Seek out gear made with Gore-Tex or similar advanced fabrics. A mere ‘water-resistant’ jacket won’t suffice when you’re trekking for hours through the relentless drizzle of the Milford Track. You need a jacket with taped seams and a solid waterproof rating to keep dry. Breathability is just as important; it lets sweat vapor escape, preventing clamminess and chill from within. Features like pit zips under the armpits offer added ventilation. Don’t neglect your legs—waterproof overtrousers are essential, not a luxury. Slip them over your hiking pants when the skies open up to keep your lower half dry and warm, ensuring the day remains enjoyable.
Trousers, Tops, and the Essentials
Beyond the core layering system, the rest of your wardrobe should follow the same principles of versatility and function. Durable, quick-drying hiking trousers with some stretch are ideal for scrambling over rocks or navigating tricky switchbacks. Convertible pants that zip off into shorts offer handy two-in-one options. Pair these with comfortable trousers or jeans for relaxing in towns like Wanaka or Christchurch. Your tops should mirror this strategy: several technical t-shirts (merino or synthetic) for activity, alongside a casual shirt for dining out. Lastly, never underestimate the importance of your underlayers. Pack multiple pairs of wool hiking socks—they cushion, wick moisture, and are your best defense against blisters. Your feet are your vehicle on this adventure—treat them like royalty. Combine with quick-drying synthetic or merino underwear for all-day comfort.
Footwear: The Foundation of Your Quest
Your connection to the trails, mountains, and valleys of the South Island comes through the soles of your feet. Selecting the wrong footwear is the quickest way to turn a dream trip into a painful experience. Your shoe collection for New Zealand should be a carefully chosen trio, each serving a specific purpose.
The Essential Hiking Boot
This is the most important piece of gear you will pack. A sturdy, waterproof hiking boot with strong ankle support is essential for most of the South Island’s trails. The terrain can be rugged, uneven, and slippery. The ankle support offered by a mid or high-cut boot will help prevent twists and sprains on challenging routes like the Routeburn or Mueller Hut. A waterproof membrane is crucial to keep your feet dry during frequent stream crossings and unpredictable rain. The most important rule with hiking boots: never, ever bring a brand-new pair. You must break them in well before your trip. Wear them on walks, around the house, or to the grocery store—do whatever it takes to ensure they conform to your feet. A boot that feels fine for ten minutes in a store can cause painful hot spots after ten kilometers on the trail. Your well-worn, trusted hiking boots are the foundation of your entire adventure.
The Recovery Shoe
After a long day of trekking in your sturdy boots, your feet will be craving relief. This is where the recovery shoe comes in. This can be a pair of lightweight trainers, comfortable trail runners, or casual sneakers. The goal is to give your feet a break and allow them to breathe. They’re ideal for walking around town, driving between locations, or relaxing in your hostel or hotel. Having a second pair of shoes also serves as an important backup; if your main boots become soaked, you’ll have a dry alternative while they slowly dry.
The Utility Footwear
Finally, a simple pair of flip-flops or water-friendly sandals is an invaluable addition. They’re perfect for the golden beaches of Abel Tasman National Park, padding around a campsite, or using communal hostel showers. They weigh almost nothing, take up minimal space, and you’ll find yourself using them more often than expected. From a post-hike swim in a glacial lake to a soak in a thermal hot pool, their usefulness cannot be overstated.
The Adventurer’s Arsenal: Essential Gear and Equipment
With your wardrobe organized, it’s time to gather the essential gear. This equipment will carry your belongings, illuminate your path, and ensure your safety as you explore wild landscapes.
The Vessel: Selecting Your Pack
Your backpack is your portable home, and by the end of your trip, you’ll form a close bond with it. You’ll probably need two: a larger pack for your main luggage and a smaller daypack for daily adventures. For your main luggage, you can choose between a large travel backpack (50-70 liters) or a traditional suitcase. If you plan to move frequently between hostels and use bus transportation, a backpack provides better mobility over cobblestones, stairs, and unpaved paths. If you’ll be renting a car and staying in well-established accommodations, a wheeled suitcase may be more convenient and easier to organize. Your daypack, however, is essential. A pack of around 20-30 liters is ideal. It should be big enough to carry your daily necessities: a rain jacket, an extra warm layer, water, snacks, a camera, and sun protection. Look for one with comfortable shoulder straps, a supportive hip belt to relieve your shoulders, and side pockets for water bottles. An integrated rain cover is a valuable feature.
Finding Your Way: Navigation and Light
While your smartphone will be your primary navigation device, you shouldn’t rely on it entirely. Cell service is unavailable across large parts of the South Island’s national parks, and batteries can run out. As a backup, consider downloading offline maps through apps like Maps.me or Gaia GPS. For those venturing onto more challenging, less-traveled trails, carrying a physical topographic map and a compass—and knowing how to use them—is a vital safety precaution. Equally important is a dependable headlamp. This is not only for experienced mountaineers but also for quietly navigating a dark hostel dorm room, finding your way to the bathroom at a remote campsite, or making an early start to catch a sunrise from a mountain summit. It’s a small piece of gear that can be a lifesaver in unexpected situations. Always bring spare batteries.
Sustenance and Safety: Water, Food, and Poles
Staying hydrated is essential for health and performance on the trail. Carry a reusable water bottle or hydration reservoir (such as a CamelBak) with at least two liters of capacity. Tap water in New Zealand is safe and tasty, and you can refill in towns. Though mountain water often appears pure, it’s wise to treat water from streams—especially in areas affected by agricultural runoff or heavy human traffic—using a filter, purification tablets, or a SteriPen. To keep your energy up, always bring more snacks than you think you need. High-energy options like trail mix, granola bars, and chocolate are ideal. Finally, consider trekking poles. Once seen as equipment for older hikers, they are now popular with adventurers of all ages. They significantly reduce knee strain during steep descents, provide extra stability and power on climbs, and aid balance when crossing rivers or slippery terrain. After a long day on trails like the Kepler Track, your knees will appreciate them.
The Alchemist’s Kit: Health, Safety, and Toiletries
Your well-being is crucial. A compact, well-equipped kit can mean the difference between a minor inconvenience and a trip-ruining problem. Think of it as your personal field hospital and your protection against the island’s smaller, yet no less challenging, inhabitants.
The First-Aid Compendium
While you can purchase a pre-assembled first-aid kit, it’s always better to tailor it to your needs. Blisters are the most frequent ailment for hikers, so include a dedicated blister-care kit with antiseptic wipes, various sizes of plasters (band-aids), and specialized blister treatments such as moleskin or Compeed. Don’t forget standard items like pain relievers (ibuprofen or paracetamol), antihistamines for allergic reactions, and any personal medications you may need (with enough supply for the entire trip plus a few extra days). Antiseptic cream and sterile dressings are vital for cleaning and covering inevitable scrapes and cuts. This small kit offers immense peace of mind.
The Sun and The Sandflies
The two main natural irritants of the South Island are the sun and the sandflies. New Zealand’s sun is particularly intense due to a thinner ozone layer in the region, making sunburn a faster risk than in many other places—even on cloudy days. High-SPF sunscreen (SPF 30 or preferably SPF 50+) is essential. Apply it generously and reapply frequently, especially after sweating or swimming. A wide-brimmed hat and UV-protective sunglasses are also key parts of your sun-defense arsenal. Then there are the sandflies, tiny biting insects especially common on the West Coast and in Fiordland, particularly near water and shaded, damp areas. Their bites are very itchy. Use a strong insect repellent containing DEET or picaridin on exposed skin. It’s also wise to wear long, loose clothing in heavily infested zones. For the bites you inevitably get, an anti-itch cream like hydrocortisone will bring much-needed relief.
Minimalist Toiletries
For toiletries, aim for small and efficient. Transfer your liquids into travel-sized, leak-proof containers. Consider solid alternatives—shampoo bars, conditioner bars, solid toothpaste—to avoid spills and save space. A quick-dry travel towel is far more practical than a bulky cotton one from home; it soaks up a surprising amount of water and dries quickly. Don’t forget essentials like a toothbrush, toothpaste, and any personal grooming items you rely on. The goal is to stay clean and comfortable without carrying a full-sized pharmacy in your pack.
The Scribe’s Tools: Electronics and Documentation

In this digital era, staying connected and preserving memories is an essential part of the experience. However, some planning is needed to keep your devices charged and ensure your important information is always within reach.
Powering Your Journey
New Zealand uses the Type I electrical outlet, identical to Australia’s. It features two flat pins forming an inverted ‘V’, sometimes accompanied by a third flat grounding pin. You will need a travel adapter to charge your devices. To power multiple devices at once from a single outlet, bring a small, lightweight power strip. One of the most indispensable pieces of electronic equipment you can bring is a portable power bank. During multi-day hikes, long bus rides, or stays in remote huts without electricity, a power bank will be essential for keeping your phone and camera running. Opt for one with enough capacity to charge your phone at least two or three times.
Capturing the Epic
Whether you’re using a smartphone or a dedicated camera, the South Island is a photographer’s dream. The scenery is so stunning that you’ll find yourself frequently reaching for your device. Make sure you have plenty of storage space. Bring extra memory cards for your camera—it’s better to have more than to be forced to delete photos to free up space. A spare camera battery is also a smart buy, since cold weather can cause batteries to drain faster than usual. For those intent on capturing the breathtaking night skies of the dark sky reserves or the smooth flow of the island’s many waterfalls, a lightweight travel tripod is invaluable.
Your Paper Trail
Your documents are your most valuable possessions. Your passport is your gateway to the country, so ensure it is valid for at least three months beyond your intended departure date. Check visa requirements for your nationality well in advance. Bring your driver’s license if you plan to rent a vehicle, and it’s strongly recommended to obtain an International Driving Permit (IDP) to accompany it. The most crucial document of all is your travel insurance policy. For trips involving adventure activities, comprehensive travel insurance is not optional; it is an essential safety net. Before you leave, create digital copies of everything—passport, driver’s license, insurance policy, flight confirmations—and upload them to a secure cloud service like Google Drive or Dropbox. It’s also wise to keep a few physical photocopies stored separately from the originals.
Tailoring Your Pack: Season by Season
The South Island dons a different cloak with each season, requiring your packing list to adjust accordingly. While the core principles of layering remain constant, the weight and type of those layers will vary significantly.
Summer’s Radiance (December – February)
This is the peak season, featuring long, warm days ideal for hiking and water activities. You’ll pack lighter layers such as t-shirts, shorts, and a lightweight fleece. However, don’t be deceived—the alpine weather can shift suddenly. It’s essential to still bring full waterproof rain gear, a warm mid-layer (like a fleece or a light puffy jacket), and a beanie for cool evenings or high-altitude hikes. Sun protection is especially crucial during these months.
Autumn’s Golden Hues (March – May)
As the crowds thin, the landscape bursts into golden autumn colors, especially around Arrowtown and Wanaka. Days are generally stable and clear, but temperatures drop significantly. Warmer mid-layers and a heavier insulated jacket will be necessary for the evenings. Be ready for frosty mornings and the first dustings of snow on the peaks. This season is a photographer’s paradise but calls for packing extra warmth.
Winter’s Majesty (June – August)
Winter turns the South Island into a snowy wonderland, perfect for skiing and snowboarding in Queenstown and Wanaka. The packing list becomes far more specialized: thermal base layers, a heavily insulated outer jacket (or a sturdy shell paired with a thick down mid-layer), waterproof ski pants, warm gloves or mittens, a neck gaiter or balaclava, and thick wool socks. Even if you’re not on the slopes, this level of warmth is needed for sightseeing, as temperatures in many places hover at or below freezing.
Spring’s Awakening (September – November)
Spring is a season of dramatic renewal and unpredictable weather—you might experience all four seasons in a single day. Waterfalls are at their peak, fed by melting snow, and early wildflowers begin to bloom. Your layering system will be challenged. Be prepared for everything: warm, sunny afternoons, cold southerly winds, and sudden mountain snow showers. Versatility is key; pack for cold conditions but also have lighter options available.
The Unseen Essentials: What Not to Forget

Some of the most essential items on your packing list are those that don’t fit neatly into specific categories. These small things can significantly enhance the quality and smoothness of your trip.
The Safety Net: Travel Insurance
It’s worth emphasizing: never travel to New Zealand for adventure activities without comprehensive travel insurance. Whether it’s a twisted ankle on a remote trail, a lost suitcase, or a cancelled flight, having a solid policy offers a safety net that lets you explore with peace of mind. Be sure to read the policy thoroughly to confirm it covers the particular activities you intend to do, like hiking, bungee jumping, or skiing.
Comfort and Downtime
Adventure is thrilling, but there will be periods of rest—on lengthy bus rides, in a hut after a day’s trek, or while relaxing in a quiet café. A good book or an e-reader packed with your favorite titles is ideal for these times. Bringing a travel journal and pen gives you a way to reflect on the amazing experiences and capture memories beyond what photos can convey. For light sleepers, an eye mask and earplugs are must-haves for surviving shared dorm rooms in hostels and ensuring you get the rest needed to fuel your next day’s adventure.
Conscious Travel
New Zealand takes pride in its pristine environment and its ‘Tiaki Promise’—a pledge to take care of the land. Do your part by embracing sustainable travel habits. Since single-use plastic bags are banned, bring a reusable tote for groceries and souvenirs. If you’re a coffee lover, carry a reusable coffee cup. Follow Leave No Trace principles on all your hikes, making sure to pack out everything you bring in.
Final Pre-Flight Checklist: Before You Zip the Bag
The moment of truth has arrived. Your bag lies open, filled with carefully selected gear that embodies your hopes and plans. Before closing that final zipper, run through this mental checklist one last time. Are your boots fully broken in? Have you notified your bank of your travel dates to prevent any annoying card freezes? Are both digital and physical copies of your important documents securely stored in different places? Have you weighed your bags to ensure they comply with your airline’s luggage allowance? Have you downloaded offline maps, your favorite podcasts, and a few movies for the long flight? Take a deep breath. You’ve done the preparation. You are ready.
The Road Goes Ever On

Packing for New Zealand’s South Island is more than just a task; it marks the beginning of the adventure itself. It involves intention, a careful anticipation of the challenges and marvels that lie ahead. Each item you select is a piece of a puzzle that, when perfectly arranged, creates a seamless experience, allowing you to fully immerse yourself in the moment. You are equipped not only with gear but with knowledge. You are ready to stand at the base of Aoraki/Mount Cook and feel small, to hear the profound silence of Milford Sound, to experience the thrill of a Queenstown leap, and to discover peaceful solitude on a windswept shore. Your bag is packed, your journey awaits. The road is calling, and it stretches endlessly forward. Travel safely, and savor every drop of the adventure.